Skip to content
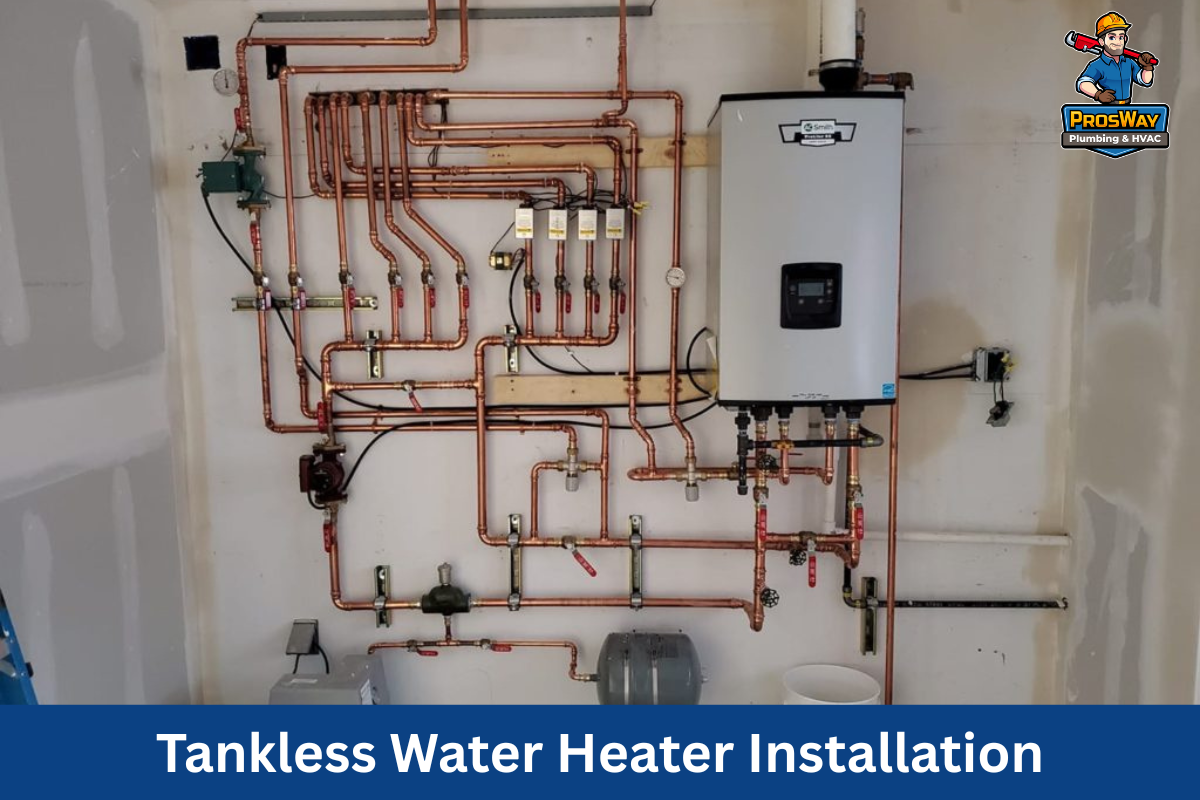
Tankless water heaters are changing how homeowners in Northern New Jersey access hot water. Instead of storing gallons in a large tank, these systems heat water only when it’s needed. The result is a constant supply without standby losses. With models available in both gas and electric options, there’s a solution for nearly every household size and budget. This guide outlines the step-by-step installation process for both types, the tools and code requirements, and much more.
All About Tankless Water Heaters
Tankless water heaters come in two main types: gas-powered and electric-powered.
- Gas-powered units run on either natural gas or propane. They’re rated by BTU input, often in the 150,000–199,000 BTU/h range, and can deliver high GPM for homes with multiple simultaneous demands. Because they burn fuel, they require proper venting, usually direct vent or concentric vent systems, and many modern models meet Low NOx emission standards for reduced environmental impact.
- Electric-powered units heat water using a home’s electrical supply. They operate on a 240-volt circuit with a double-pole breaker, and the wire gauge, typically 6 AWG or 8 AWG, must match the model’s amperage draw. Since they don’t need combustion air or venting, they can be installed in more varied locations, making them easier to place in tight spaces.
Key Benefits
- Energy efficiency — High UEF ratings and ENERGY STAR models cut utility costs.
- Endless hot water — Right-sized units deliver consistent GPM.
- Space-saving — Wall-mounted in tight spaces like a basement or utility room.
- Longer lifespan — Often 20+ years with proper maintenance.
Gas vs. Electric Tankless Water Heaters – Which One Should You Choose?
Gas Tankless Units
The Gas tankless units have a clear advantage in flow rate. With the ability to produce higher GPM, they can handle multiple fixtures running at the same time, which is important for larger households.
Another benefit is that some models can operate during a power outage when paired with battery ignition. This is especially useful in Northern New Jersey, where winter storms can cause outages.
However, gas installations have higher upfront costs, and you’ll need to follow NFPA 54 standards for gas line sizing, venting, and combustion air. Some homes will require a gas line upgrade to meet the unit’s BTU input needs.
Electric Tankless Units
Electric tankless water heaters have a lower purchase price and a simpler electric heater installation process. They don’t require venting or combustion air, and they produce zero on-site emissions.
However, their flow rate is limited, often to around 3–5 GPM, which means they’re best suited for smaller households or as point-of-use systems. Also, they rely entirely on the home’s electricity.
Upgrades will be needed if the panel can’t handle the amperage draw, including breaker size and wire gauge in line with NFPA 70.
Best Choice for Northern New Jersey Homes
- Gas often wins for large families or high simultaneous use.
- Electric can be ideal for condos, small households, or point-of-use setups.
- Climate matters; cold inlet water in winter means gas handles temp rise better.
- Always size based on total GPM demand and temperature rise.
Tools and Materials Needed for Installation

- Adjustable wrench
- Pipe cutter
- Screwdriver set
- Drill
- Teflon tape
- Gas line & sediment trap (gas units)
- Electrical wiring, breaker (electric units)
- Venting kit (gas units, stainless steel or PVC per manufacturer)
- Isolation valves and pressure relief valves
- Expansion tank (if PRV or check valve is present)
- Thermostatic mixing valve (for temperature control)
Safety and Local Code Requirements in Northern New Jersey
In Northern New Jersey, tankless water heater installations fall under strict local and national code requirements. Plumbing and electrical permits are generally required, and work must comply with NFPA 54 for gas systems and NFPA 70 for electrical systems.
Gas line safety checks are mandatory before the unit is placed in service. Additionally, venting must meet clearance requirements outlined by both code and the manufacturer.
For gas models, carbon monoxide safety is a top priority. That means installing detectors in the home and ensuring the venting is sealed and properly routed to the exterior. Electric hot water tank installations must be correctly grounded and inspected to prevent electrical hazards.
Local inspectors are thorough, so following manufacturer instructions to the letter will help avoid costly delays. That said, in many cases, hiring a licensed plumber or electrician is the safest and most efficient way to complete the job while staying compliant.
How to Install a Gas Tankless Water Heater – Step-by-Step Guide
Installing a gas tankless water heater needs attentive precision. It’s necessary to be very careful to prevent gas leaks and to install outlets properly.
Step 1: Shut Off Utilities
Before you begin, turn off both the gas supply and the main water valve. This prevents accidental leaks and ensures a safe working environment. If your home’s electrical system is tied into the old unit, for example, with an electric ignition, switch off the breaker as well.
Step 2: Remove the Old Water Heater
Drain the existing tank completely. Once it’s empty, disconnect both the water and gas lines. Old fittings may require a pipe wrench or cutter to free them. Be sure to cap the gas line temporarily for safety.
Step 3: Prepare the Wall and Venting
Choose a mounting location that meets both manufacturer guidelines and local codes. For gas models, this includes clearance from combustible materials and proper vent routing.
Install the vent system, even if direct vent or concentric, ensuring that vent lengths and clearances match code requirements.
Step 4: Mount the New Tankless Unit
Use the manufacturer’s bracket or mounting hardware to secure the heater to the wall. It must be stable enough to support the unit’s weight and positioned so that water and gas connections are accessible.
Step 5: Connect Water and Gas Lines
Attach the cold and hot water lines using threaded fittings wrapped with Teflon tape. For the gas connection, use approved piping and install a sediment trap to capture debris. Test all water line connections with a leak detection solution before moving forward.
Step 6: Install Vent Pipes
Fit the venting securely, soldering all joints per the manufacturer’s instructions. Maintain the required slope for condensate drainage if you’re working with a condensing model.
Check that the termination point outside meets clearance rules from windows, doors, and other openings.
Step 7: Turn On and Test
Once everything is in place, open the water valves and turn on the gas. Purge any air from the lines and power up the unit.
Check water temperature in the bathroom, watch for leaks, and confirm that the burner is firing correctly.
How to Install an Electric Tankless Water Heater – Step-by-Step Guide
Check that you have the materials and equipment required before you begin electric water heater installation. Below is the detail:
Step 1: Shut Off Power and Water
Switch off the circuit breaker supplying power to the existing heater, and close the main water valve. Verify with a tester that the circuit is completely de-energized before starting work.
Step 2: Remove the Old Unit
Drain the old tank and disconnect the plumbing connections. Remove the wiring from the terminals and secure it safely out of the way until you’re ready to reconnect, if it’s an electric tank.
Step 3: Prepare the Mounting Area
Select a location that provides easy access for future servicing. Maintain clearances specified by the manufacturer and ensure the wall can support the weight of the unit.
Step 4: Mount the Tankless Unit
Secure the heater to the wall using the supplied bracket or recommended anchors. Keep the unit level and at a height that makes the inlet and outlet connections convenient.
Step 5: Connect Water Line
Hook up the cold water supply and hot water outlet using proper fittings. Isolation valves are recommended for maintenance and flushing.
Step 6: Wire to Electrical Panel
Confirm your electrical panel can handle the amperage draw. Run the correct wire gauge, typically 6 AWG or 8 AWG, to a double-pole breaker. Ground the unit according to the manufacturer’s instructions and the requirements of NFPA 70.
Step 7: Power On and Test
Open the water supply, purge air from the system, then switch on the breaker. Set the desired temperature, check for leaks, confirm the water heating by the unit is as expected, and enjoy a perfect heating system. This is all about electric hot water installation.
Things to Think About Before You Start (Installation Considerations)

- Water hardness: Northern New Jersey’s water often contains high mineral content. Scale buildup inside the heat exchanger can lower efficiency and shorten lifespan. Water softening or a filtration system can protect the unit.
- Proper sizing: Match the heater to your household’s peak hot water demand. Calculate total GPM for all fixtures you expect to run at the same time. Also, factor in temperature rise based on incoming groundwater temperature. Avoid undersizing (lukewarm water, stressed system) or oversizing (unnecessary cost).
- Placement and accessibility: Install where there’s space for maintenance and service. Follow the manufacturer’s clearance requirements from walls, ceilings, and openings. Position for easy access to isolation valves, filters, and venting.
Should You Install It Yourself or Hire a Pro? (Professional vs. DIY)
Installing a tankless water heater isn’t the same as swapping out a dishwasher or replacing a light fixture. Gas models require knowledge of fuel line sizing, venting, and combustion air needs.
Electric models demand proper breaker configuration, wire sizing, and grounding. Both types must meet plumbing, electrical, and often building codes to pass inspection.
A DIY approach can save labor costs, but it carries risks. Improper gas connections can lead to leaks or even explosions, while electrical mistakes could cause shocks, breaker trips, or fires.
Therefore, hiring a professional, especially one experienced with tankless installations in Northern New Jersey, means the work is code-compliant from the start.
Licensed plumbers and electricians both know the NFPA standards and understand local permitting processes, which helps avoid delays. For most homeowners, the added peace of mind is worth the cost.
Why Prosway Plumbing & HVAC Is the Go-To in Northern NJ
Prosway Plumbing & HVAC combines technical expertise with local knowledge, making them a strong choice for home improvement in Northern New Jersey. We are fully licensed and insured, and every installation is completed to meet or exceed local code requirements.
Our team has experience with both gas and electric hot water services, including upgrades to gas lines, electrical panels, and venting.
We know how to size systems for cold groundwater temperatures, which ensures reliable performance year-round.
Every job comes with warranty-backed service, so you can be confident that your investment is protected long after the installation is complete.
Wrapping It Up
A tankless water heater can deliver consistent hot water, save space, and cut energy costs when chosen and installed correctly. Gas models offer higher flow rates and better performance in colder climates, while electric models provide easier installation and lower upfront costs. The right choice depends on your home’s hot water demand, available utilities, and willingness to meet installation requirements.
Ready to make the switch to a tankless water heater?
Prosway Plumbing & HVAC can handle the entire process, from sizing and permits to final inspection. Call today for a consultation and start enjoying endless hot water in your home.